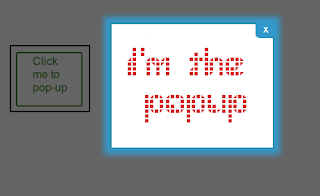
 Pop-up boxes serves multiple purposes. You can use a pop-up box to show additional information to your visitors when they click on a button or something or simply some event
 happens. Blogger does not provide a in-built way to place pop-up window in your blog. However, you can do it using some simple jQuery. I am going to show you how. Just follow the below steps to put a pop-up in to your blog.
1. Log in to your Blogger Dashboard.
2. Go to Template and then click 'Edit HTML' and Proceed.
3. Search for </head> tag using Ctrl+f in your template.
4. Copy the following code and paste it just before the </head> tag.
<script src='https://ajax.googleapis.com/ajax/libs/jquery/1.6.4/jquery.min.js' type='text/javascript'></script>
<script type='text/javascript'>
var popupStatus = 0;


function loadPopup(){

 if(popupStatus==0){
  $("#backgroundPopup").css({
   "opacity": "0.7"
  });
  $("#backgroundPopup").fadeIn("slow");
  $("#popupContact").fadeIn("slow");
  popupStatus = 1;
 }
}


function disablePopup(){
 if(popupStatus==1){
  $("#backgroundPopup").fadeOut("slow");
  $("#popupContact").fadeOut("slow");
  popupStatus = 0;
 }
}

function centerPopup(){
 var windowWidth = document.documentElement.clientWidth;
 var windowHeight = document.documentElement.clientHeight;
 var popupHeight = $("#popupContact").height();
 var popupWidth = $("#popupContact").width();
 $("#popupContact").css({
  "position": "absolute",
  "top": windowHeight/2-popupHeight/2,
  "left": windowWidth/2-popupWidth/2
 });

 $("#backgroundPopup").css({
  "height": windowHeight
 });

}

$(document).ready(function(){
 $("#button").click(function(){
  centerPopup();
  loadPopup();
 });

 $("#popupContactClose").click(function(){
  disablePopup();
 });
 $("#backgroundPopup").click(function(){
  disablePopup();
 });
 $(document).keypress(function(e){
  if(e.keyCode==27 && popupStatus==1){
   disablePopup();
  }
 });

});

//]]>
</script>
<style type='text/css'>
#backgroundPopup{
display:none;
position:fixed;
_position:absolute; /* hack for internet explorer 6*/
height:100%;
width:100%;
top:0;
left:0;
background:#000000;
border:1px solid #cecece;
z-index:1;
}
#popupContact{
display:none;
position:fixed;
_position:absolute; /* hack for internet explorer 6*/
height:450px;
width:500px;
background:#FFFFFF;
border:2px solid #cecece;
z-index:2;
padding:12px;
font-size:13px;
}
#popupContact h1{
text-align:left;
color:#6FA5FD;
font-size:22px;
font-weight:700;
border-bottom:1px dotted #D3D3D3;
padding-bottom:2px;
margin-bottom:20px;
}
#popupContactClose{
font-size:14px;
line-height:14px;
right:6px;
top:4px;
position:absolute;
color:#6fa5fd;
font-weight:700;
display:block;
}
#button{
text-align:center;
margin:100px;
}
</style>
5. Now save your Template.
6. Wherever you want to add a popup windowin your blog post, go to Edit HTML view and add the following code into it.
<div id="button"><input type="submit" value="POPUP BUTTON NAME" /></div>

<div id="popupContact">

<a id="popupContactClose">x</a>

<h1>POPUP TITLE</h1>

<p id="contactArea">

POPUP CONTENT GOES HERE

</p>
</div>

<div id="backgroundPopup"></div>
You should customize the POPUP BUTTON NAME, POPUP TITLE and POPUP CONTENT GOES HERE with your required data. Publish your post. You are done.
