How to Host Music/Audio Files into Blogger Blog

Leave a Comment
Have you ever wanted to add some music on your Blogger blog? Audio or music can be a great spice for your blog. Adding some audio files or music to your blog can entertain your visitors with the great compositions. So, how would you add music to your blog? Is it really possible? To answer this, yes you can add music files to your blog hosted on Blogger.
how-to-add-musing-to-blogger
However, blogger does not permit to upload MP3 or other file formats directly to your Blogger space. Google only allow to uplaod image files (in JPEG, JPG, PNG, ico etc. formats). You can not upload any MP3, MP4 files or even PDF or DOC files to your Blogger blog. Then, what is the solution? You can choose to upload a good cloud storage service and upload your files to it and later link them to your blog posts. There are many popular cloud storage solutions which offers hotlinking to your files. That means, you can give a direct link to your file from anywhere an access it using the link without visiting the website of your cloud storage. You can upload almost any type of files to your cloud storage space, then link from your blog. Hosting PDF and MP3 files to cloud storage and publishing them on Blogger is a popular practice among bloggers. In this post, I will be describing the process of uploading audio/MP3 files to cloud and linkink them to Blogger.
In the first step, choose any cloud storage service. My first choice would be Dropbox, which offers great file hosting services and customizable options. Ok, let me list down some of the most popular cloud storage services.
  1. Dropbox: Dropbox is the most popular cloud file hosting service, which offers 2GB free space for cloud storage. You can get more space upto 16 GB for free from Dropbox
    Adding-audio-to-blogger-using-dropbox
    using some of the options like Sharing on Facebook, Twitter, referring your friends etc. If you need more storage space, you can buy space from Dropbox also. You can upload files to Dropbox and keep them either private(which cannot be accessed by someone else other than you) or make them public (anyone can access them if he has the link to the file.) . After Joining Dropbox, you can install the Dropbox application to your computer and synchronize files in Dropbox folder. That means, after installing Dropbox, a folder will be created with some subfolders in it and when you move a file to this folder, it will automatically be uploaded to your Dropbox cloud. You can join Dropbox from this link>> and get 2.5GB of free space. To share a file on Blogger, you need to place the file in the Public folder. Then get the public link for that file. I will tell the process of embedding the audio file into blogger later in this post.
  2. ubuntu-one-to-host-file-for-bloggerUbuntu One: Ubuntu One is another popular cloud storage service. If you are using Ubuntu operating system, then you automatically get Ubuntu One installed on your system and can sign up for a 5GB free space. If you need more space, then you can
    buy from Ubuntu. Ubuntu one also works somewhat similar to Dropbox, it also synchronizes files in your Ubuntu One folder and the cloud storage. You can upload an audio file to Ubuntu one, then you need to share the file to public to be able to share on your blog. Ohh, don't get confused that you can use Ubuntu One from Ubuntu Linux only. You can install Ubuntu One on your Windows PC also and signup for a 5GB free space.
  3. Gdrive-to-host-audio-for-bloggerGoogle Drive: Google Drive is also an option for free cloud storage. If you have a
    Gmail or Google account, you automatically have 5GB of free cloud storage space on Google Drive. You can upload audio files to Google drive and share them as public to embed them into Blogger blog. You can also syncronize Google Drive with your computer's Drive.
  4. skydrive-to-host-audio-bloggerMicrosoft SkyDrive: Skydrive is also a good cloud storage service associated with any Outlook/Hotmail/Live account. SkyDrive offers 7GB of free storage space to its users and it can be run on Windows and Mac OS X. Now, SkyDrive comes as an app on windows 8. However, it has a file size limit of 300 MB for uploading. You can choose to use SkyDrive to share music publicly to your
    Blogger blog.
  5. Amazon Cloud Drive: Amazon Cloud Drive offers 5GB of free storage space when you sign up. You can also buy more spaces from amazon if you need more.
  6. Some other popular cloud storage services are iCloud(for Mac users), OpenDrive(offers 5GB free space with some limitations like 100MB file size limit, 1GB/day bandwidth, 200KB/s speed etc.) Box, Mediafire, Rapidshare etc. But, Box, Mediafire and Rapidshare does not provide hotlink to your files for free accounts. You need to purchase paid storage to get Hotlink to your files. So, to publish media on Blogger blog, I do not reccomend these services. You can try any of the 5 cloud storages I have mentioned earlier.
After uploading your files to the Cloud storage, the next thing is to share them embedding into your Blog. I am now going to tell you how to embed audio files in Blogger blog.
HTML5 supports embedding audio or music files to HTML doccument using the <audio> tag without using any third party plugin. The <audio> tag is a new feature of HTML5 which you can use to natively embed audio playback in any HTML document. It is supported in Internet Explorer 9, Firefox, Opera, Chrome, and Safari, and can be set to play the linked audio file automatically (autoplay) or loop if required.

Here's a basic example using the <audio> element: 

The player is generated using the following code:


<audio controls="">
<source src="audio-file-url">
<b><span colour="red">
<b>
If you don't see the audio your browser does not support the audio element.
</b>
</span>
 </b>
</audio>
Now, in the above example, you can set the control to 'autoplay' or 'loop' if you want your audio file autoplayed or looped when the page loads. To add an audio file in your blog post, first get the full URL of your file that you have hosted to Dropbox or any other cloud storage(Remeber, if you are using Dropbox, you need to put the file in Public folder), then Go to HTML editor in your post editor and insert this code:


<audio controls="">
<source src="audio-file-url-copied-from-storage"></source>
<b><span colour="red">
<b>
</b>
</span>
</b>If you don't see the audio controls, your browser does not support the audio element.
</audio>
Before publishing, ensure that you have the right to publish the music to public and you do not infringe the copyright for the item.

That's it. You are good to go. If you liked the tutorial, please share it to Facebook, Google+ etc. Thanks.
Read More...

How to Add Go to Top and Bottom Navigation Button using jQuery

Leave a Comment
Navigation buttons help your blog visitors to navigate easily among contents of your blog. When you have a long blog post which spans below the usually visible viewport of the browser, the reader must have to scroll below to find what is below the viewport. So, scrolling to bottom he reads your blog post, and if he want to come back to Top he again needs to scroll up. What if there is a shortcut at the bottom of your page which directs the readers to Top of the page when clicked? this should be nice right? You can use HTML tag to add a button at bottom or top of your page to use as a top and bottom navigator. But using jQuery, you can stylify the buttons and your readers will also be impressed with a fancy look of your blog. This buttons also helps your visitors to navigate when a main page has lots of contents or posts displayed in it. Here, I am going to tell you how you can add a ‘Go to Bottom’ and ‘Go to Top’ navigator button to your blogger blog. I am going to describe the whole thing step by step.
Step I: You obviously need to log into your Blogger account and select the appropriate Dashboard of the blog where you want to make the changes.
Step II: Go to Template and Click on Edit HTML. Click ‘Proceed’ if required.
Step III: Press CTRL+F and find ]]>

Step IV: Just above this, copy and paste the following code snippet:


/* Go to Top and Bottom Buttons with jQuery by TechBhuvan*/
.button_up{
padding:7px; 
/* Distance between the border and the
icon. you may change according to your choice  */
background-color:white;
border:1px solid #CCC; /* Border Color */
position:fixed;
background: white 
url
(http://4.bp.blogspot.com/-UnMFYoCWxx4/Uqw4nN8VyzI/AAAAAAAABYY/
rALbiar5mNY/s1600/scroll-to-top.png) 
no-repeat top left;
background-position:50% 50%;
width:20px; /* Button’s width */
height:20px; /* Button’s height */
bottom:280px; /* Distance from the bottom */
right:5px; /* Change right to left if you want the buttons on the left */
white-space:nowrap;
cursor: pointer;
border-radius: 3px 3px 3px 3px;
opacity:0.7;
filter:progid:DXImageTransform.Microsoft.Alpha(opacity=70);
}
.button_down{
padding:7px; /* Distance between the border and the icon */
background-color:white;
border:1px solid #CCC; /* Border Color */
position:fixed;
background: white 
url
(http://3.bp.blogspot.com/-lCFVt3QT1XQ/Uqw4nObSTEI
/AAAAAAAABYU/GZwEaQ3AoQg/s1600/gotobottom.png) 
no-repeat top left;
background-position:50% 50%;
width:20px; /* Button’s width */
height:20px; /* Button’s height */
bottom:242px; /* Distance from the bottom */
right:5px; 
/* Change right to left if you want the buttons on the left */
white-space:nowrap;
cursor: pointer;
border-radius: 3px 3px 3px 3px;
opacity:0.7;
filter:progid:DXImageTransform.Microsoft.Alpha(opacity=70);
}
You can change the credentials according to your choice, just go through the comments and you will understand which one is used for what. You can replace the arrows with your own arrow image, Just replace the links in the url([http://url]).
Step V: Now press CTRL+F again and search for
</body>
Step VI: Just above the closing body tag, copy and paste the following code snippet:
<script 
src=’http://ajax.googleapis.com/ajax/libs/jquery/1.7.1/jquery.min.js’
 type=’text/javascript’/>
 
<div class=’button_up’ id=’button_up’ style=’display:none;’/>
<div class=’button_down’ id=’button_down’ style=’display:none;’/>
 
<script>
//<![CDATA[
(function()
{var special=jQuery.event.special,uid1='D'+(+new Date()),
uid2='D'+(+new Date()+1);
special.scrollstart={setup:function()
{var timer,handler=function(evt)
{var _self=this,_args=arguments;if(timer)
{clearTimeout(timer)}
else{evt.type='scrollstart';jQuery.event.handle.apply(_self,_args)}
timer=setTimeout(function(){timer=null},
special.scrollstop.latency)};
jQuery(this).bind('scroll',handler).data(uid1,handler)},
teardown:function(){jQuery(this).unbind('scroll',
jQuery(this).data(uid1))}};
special.scrollstop={latency:300,
setup:function()
{var timer,handler=
function(evt){var _self=this,_args=arguments;
if(timer){clearTimeout(timer)}
timer=setTimeout(function(){timer=null;
evt.type='scrollstop';
jQuery.event.handle.apply(_self,_args)},
special.scrollstop.latency)};
jQuery(this).bind('scroll',handler).data(uid2,handler)},
teardown:function()
{jQuery(this).unbind('scroll',jQuery(this).data(uid2))}}})();
 
$(function() {
var $elem = $('body');
$('#button_up').fadeIn('slow');
$('#button_down').fadeIn('slow');
$(window).bind('scrollstart', function(){
$('#button_up,#button_down').stop().animate({'opacity':'0.2'});
});
$(window).bind('scrollstop', function(){
$('#button_up,#button_down').stop().animate({'opacity':'1'});
});
$('#button_down').click(
function (e) {
$('html, body').animate({scrollTop: $elem.height()}, 800);
} );
$('#button_up').click(
function (e) {
$('html, body').animate({scrollTop: '0px'}, 800);
} );});
//]]>
</script>
Step VII: Save your Template. You are done. To see the code is working or not, open your blog in the browser and see yourself.

There is another method to insert the Scroll to top button. Here it goes.
Step I: Log in to Blogger Dashboard, Go to Layout and Add an HTML/Javascrpt Gadget.
Step II: Copy and paste the following code to the HTML/Javascript gadget.
<script type="text/javascript" 
src="http://ajax.googleapis.com/ajax/libs/jquery/1.3.2/jquery.min.js">
</script> 
<script type="text/javascript" > 
var scrolltotop={ //startline: Integer. Number of pixels 
//from top of doc scrollbar is scrolled before showing control 
//scrollto: Keyword (Integer, or "Scroll_to_Element_ID"). 
How far to scroll document up when control is clicked on (0=top). 
setting: {startline:100, scrollto: 0, scrollduration:1000, 
fadeduration:[500, 100]}, 
controlHTML: '<
img src=
"https://lh4.googleusercontent.com/-6Y8MPUpGYpU/USzs5rEhNsI/AAAAAAAADvk/
iXzptu4bODg/h120/scroll-to-top.png" />', 
//HTML for control, which is auto wrapped in DIV w/ ID="topcontrol"
 controlattrs: {offsetx:5, offsety:5},
 //offset of control relative to right/ bottom of window corner anchorkeyword: '#top', 
//Enter href value of HTML anchors on the page that should also act as "Scroll Up"
 links state: {isvisible:false, shouldvisible:false}, 
scrollup:function(){ if (!this.cssfixedsupport)
 //if control is positioned using JavaScript
// this.$control.css({opacity:0})
 //hide control immediately after clicking it 
var dest=isNaN(this.setting.scrollto)? 
this.setting.scrollto : parseInt(this.setting.scrollto)
 if (typeof dest=="string" && 
jQuery('#'+dest).length==1)
 //check element set by string exists dest=jQuery('#'+dest).offset().top 
else dest=0 this.$body.animate({scrollTop: dest},
 this.setting.scrollduration); },
 keepfixed:function()
{ var $window=jQuery(window) var controlx=$window.scrollLeft() 
+ $window.width() - this.$control.width()
 - this.controlattrs.offsetx
 var controly=$window.scrollTop() + $window.height() - this.$control.height()
 - this.controlattrs.offsety this.$control.css({left:controlx+'px', top:controly+'px'}) },
 togglecontrol:function()
{ var scrolltop=jQuery(window).scrollTop() if (!this.cssfixedsupport) 
this.keepfixed()
 this.state.shouldvisible=(scrolltop>=this.setting.startline)? true : false
 if (this.state.shouldvisible && !this.state.isvisible)
{ this.$control.stop().animate({opacity:1},
 this.setting.fadeduration[0]) this.state.isvisible=true }
 else if (this.state.shouldvisible==false && this.state.isvisible)
{ this.$control.stop().animate({opacity:0}, 
this.setting.fadeduration[1]) this.state.isvisible=false } },
 init:function(){ jQuery(document).ready(function($)
{ var mainobj=scrolltotop
 var iebrws=document.all mainobj.cssfixedsupport=!iebrws
 || iebrws && 
document.compatMode=="CSS1Compat"
 && window.XMLHttpRequest
 //not IE or IE7+ browsers in standards mode mainobj.$body=(window.opera)? 
(document.compatMode=="CSS1Compat"? $('html')
 : $('body')) : $('html,body') 
mainobj.$control=$('<div id="topcontrol">'+mainobj.controlHTML+'</div>') 
.css({position:mainobj.cssfixedsupport? 'fixed' : 'absolute', 
bottom:mainobj.controlattrs.offsety, right:mainobj.controlattrs.offsetx, opacity:0, 
cursor:'pointer'}) .attr({title:'Scroll Back to Top'})
 .click(function(){mainobj.scrollup(); return false}) .appendTo('body') 
if (document.all && !window.XMLHttpRequest && 
mainobj.$control.text()!='')
 //loose check for IE6 and below, plus whether control contains any text
 mainobj.$control.css({width:mainobj.$control.width()}) 
//IE6- seems to require an explicit width on a DIV containing text mainobj.togglecontrol() 
$('a[href="' + mainobj.anchorkeyword +'"]').
click(function(){ mainobj.scrollup() return false }) 
$(window).bind('scroll resize', 
function(e){ mainobj.togglecontrol() }) }) } }
 scrolltotop.init() </script>

Read More...

How to add a Random Post Widget to Blogger blog

Leave a Comment

For bloggers, traffic is the ultimate goal. Getting more traffic is always important for bloggers. If your blog has a high ranking in search engines, you will get good traffic from Search engines. But what about bounce rates? Bounce rates are those who comes from search engienes to your specific blog post,
Add-Random-posts-widget-to-blogger
 consumes your content and leave; not bothering about what else are there in the blog.
 If you are using a simple design in your blog and have very less links visible to contents 
 of your blog, then you have a high chance of loosing your readers so early. If you can showcase your blog contents wisely and properly, then you can reduce the bounce rate of your blog to a great extent. To showcase your blog posts, you can use various techniques like placing link on the navigation bar, in the sidebar, placing tag list or tag cloud etc.
 A very interesting and useful way is to place a 'Random Posts' widget to your blog. You may place the widget into sidebar or any place of your convenience and showcase the
 Random Posts you have made on your blog. 'Random Post widget will show the posts titles with a brief summary of the post in the widget. This particular widget will show 5 Random Posts on your blog. You can customize the number of posts and may increase the number or reduce according to your choice. When your visitor see the Random Posts and if he/she finds something interesting, then he/she will not leave you blog without clicking on that item and having a look into it. So, you are keeping your visitors engaged to your blog as much time you can.
Ok, no more boring descriptions. Let me proceed with the steps to add a Random Posts widget to your blog.
Step I: You already know that you have to log into your blogger account and go to the particular
 blog Dashboard where you want to add the widget.
Step II: Now, click on Layout. Add an HTML/Javascript gadget. It is advisable to add the gadget to the
 sidebar if you are using a layout which have a sidebar. Else you can add anywhere you find convenient.
Step III: Copy and Paste the following code in the code snippet to the HTML/Javascript widget.
Step IV: Save Your Gadget. Arrange you gadget to the place where you want to display the Random Posts.
 Click on 'Save arrangements'.
You are done. Now open your blog in a browser to check if it is working or not. If you have any query or 
advice, please feel free to comment below. Share us if you are benifitted. Thanks.


<style type='text/css'>
#tb-random-posts img{float:left;margin-right:10px;border:1px solid #999;background:#FFF;
width:36px;height:36px;padding:3px}
</style>
 
<ul id='tb-random-posts'>
<script type='text/javaScript'>
var rdp_numposts=5;
var rdp_snippet_length=150;
var rdp_info='yes';
var rdp_comment='Comments';
var rdp_disable='Turn off comments';
var rdp_current=[];var rdp_total_posts=0;var rdp_current=
new Array(rdp_numposts);function totalposts(json)
{rdp_total_posts=json.feed.openSearch$totalResults.$t}
document.write('<script type="text/javascript" 
src=
"/feeds/posts/default?alt=json-in-script&max-results=0&callback=totalposts"></script>');
function getvalue(){for(var i=0;i<rdp_numposts;i++)
{var found=false;var rndValue=get_random();
for(var j=0;j<rdp_current.length;j++){if(rdp_current[j]==rndValue)
{found=true;break}};if(found){i--}else{rdp_current[i]=rndValue}}};
function get_random()
{var ranNum=1+Math.round(Math.random()*(rdp_total_posts-1));return ranNum};
</script>
<script type='text/javaScript'>
function random_posts(json)
{a=location.href;y=a.indexOf('?m=0');for(var i=0;i<rdp_numposts;i++)
{var entry=json.feed.entry[i];var rdp_posttitle=entry.title.$t;
if('content'in entry){var rdp_get_snippet=entry.content.$t}
else{if('summary'in entry){var rdp_get_snippet=entry.summary.$t}
else{var rdp_get_snippet="";}};
rdp_get_snippet=rdp_get_snippet.replace(/<[^>]*>/g,"");
if(rdp_get_snippet.length<rdp_snippet_length){var rdp_snippet=rdp_get_snippet}
else{rdp_get_snippet=rdp_get_snippet.substring(0,rdp_snippet_length);
var space=rdp_get_snippet.lastIndexOf(" ");
rdp_snippet=rdp_get_snippet.substring(0,space)+"&#133;";};
for(var j=0;j<entry.link.length;j++)
{if('thr$total'in entry){var rdp_commentsNum=entry.thr$total.$t+' '+rdp_comment}
else{rdp_commentsNum=rdp_disable};if(entry.link[j].rel=='alternate')
{var rdp_posturl=entry.link[j].href;if(y!=-1)
{rdp_posturl=rdp_posturl+'?m=0'}
var rdp_postdate=entry.published.$t;if('media$thumbnail'in entry)
{var rdp_thumb=entry.media$thumbnail.url}
else{rdp_thumb=
"https://blogger.googleusercontent.com/img/b/R29vZ2xl/AVvXsEgybA-eXGcg73LsUUmcNrz_BJsDbLuwfUZtgnYyA6DjXVMrz4Qku1K5bIAWCjraGQqB7QERTMbOEjgWonGTF81H4AQLOD3rqWQSDw8jeyeVT0vP1aL_S0Hwft43GfrNQNmn0OdnpiluKOpd/s1600/no-image.PNG"}}};
document.write('<li>');
document.write('<img alt="'+rdp_posttitle+'" src="'+rdp_thumb+'"/>');
document.write
('<div><a href="'+rdp_posturl+'" rel="nofollow" 
title="'+rdp_snippet+'">'+rdp_posttitle+'</a></div>');
if(rdp_info=='yes'){document.write('<span>'+rdp_postdate.substring
(8,10)+'/'+rdp_postdate.substring(5,7)+'/'+rdp_postdate.substring(0,4)+' - '+rdp_commentsNum)
+'</span>'}
document.write('<div style="clear:both"></div></li>')}};
getvalue();for(var i=0;i<rdp_numposts;i++)
{document.write
('<script type="text/javascript" src="/feeds/posts/default?
alt=json-in-script&start-index='+rdp_current[i]+'&max-results=1
&callback=random_posts"></script>')};
</script>
</ul> 
Read More...

How to Earn Money by writtings Sponsored Reviews on Your blog

Leave a Comment
earn money from sponsored blogYou may already know that bloggers make money not only by placing ads in their blogs, but from various sources. One of the prime source is Sponsored blog post. Many companies pay bloggers to write blogs about their products in their personal blog. Bloggers those who have vast audience gets easily such sponsored posts or sponsored reviews about some product someone wants to be endorsed. Sponsored Reviews and Sponsored posts are popular way of money making among the bloggers. You can also earn some money writting sponsored reviews and endorsing some product in your blog posts. In this post I am going to tell you some good websites where you can search and get sponsored post for your blog.
  1. SponsoredReviews : SponsoredReviews.com is a most prefered option for bloggers to get sponsored posts and reviews for a blog. It is one of the old but popular website of its kind. You can sign up for SponsoredReviews and give a try. But there are some shortcomings in using Sponsored Reviews. One, Sponsored Reviews keep 50% commission you generate from every sponsored post as they were acting as a mediator between you and the advertiser. And two, To get qualified and approved for SponsoredReviews, your blog must have a goog Google page rank and Alexa rank. Sponsored Reviews has some strict rules when they consider blogs. Some of the regulations they have mentioned in their FAQ page are:
  • Your blog must be at least 3 months old and be cached/indexed in the major search engines, including Google.
  • Your blog must have a minimum of 10 backlinks. Backlink analysis is verified through Majestic SEO.
  • Your blog must be submitted to a category that is the most relevant for your site.
  • Your blog must contain at least 10 archived posts with a minimum of 3000 combined word count.
  • Your blog must not contain duplicate content scraped from other sites.
  • Your blog must have a professional appearance.
  • Sponsored Reviews reserve the right to reject blogs that contain too much visual clutter. You are free to use ads, banners and badges, but if they overwhelm the content itself they may reject the blog.
  1. ReviewMe: Reviewme.com is yet another website of its kind which brings you sponsored product reviews. You just need to write good reviews about a product they will give you to write. You can find a very good number of advertisers in this website for your need. They may higher you to write reviews if your blog is having good trafic and potential to market their product.
  2. PostJoint: Postjoint.com can also be another option for sponsored posts. It is a quite new network, but it has a very good number of advertisers so, you have a good chance of getting some sponsored reviews in this website. You just need to sign up on PostJoint, get approval for sponsored posts and then you may be getting sponsored reviews from advertisers for your blog. You have to ask for a price for your post or review and if the advertiser finds it comfortable, then they will place an order for you.
There are some other options to get sponsored reviews for your blog. You may ask advertisers to contact you directly by placing a banner on your blog or you may practice similar tactics. If you have other mind blowing ideas, please share in below comment box.

Read More...

How To Disable Or Turn Off Lightbox for Images in Blogger

Leave a Comment
For the images placed in a blog which is hosted in blogger.com, when clicked, is opened into a transparent new view area. The other contents of the blog post remains in the background. This is known as Lightbox or sometimes also called as Greybox or Thickbox This feature can also be seen in Facebook, Google+ etc. This is indeed an unique way to display pictures in enlarged mode than the normal mode, and some people find it pretty cool, but some people does not like this feature. Though Blogger by default enables Lightbox on your blogger blog, you can disable this feature if you want so. Just follow this steps to disable Lightbox viewing of photos on your blogger blog.

Log in to your blogger account and go to your blog’s Dashboard.
Now move onto Settings > Post and Comments
Look for ‘Open Images in Lightbox’ and select ‘No’ from the drop down.
Save your settings and you are done with disabling Lightbox on your blog.
You can test opening a post that contains images and click on it. You will now see that it is not opening in Lightbox.Disable Lightbox
This is it. Happy Blogging.
Read More...

How to Add a Facebook Pop-up Like box to your Blogger blog or website

Leave a Comment
You must have seen the facebook like boxes those pop-up when you enters a website. That pop-up box shows the Facebook like counts and some profile images of the likers showing that people are liking the page on Facebook. This may motivate a visitor to press
Facebook Pop-up Like box in Blogger blog
the like button of the facebook page of a content rich website or blog which will definitely increase the social presence of the blog. This may be useful to spread your voice and increase your reader via facebook. So I myself wondered how bloggers do that in their blogs and did some research. And finally got to know how to achieve the task of showing a pop-up facebook like box on blogger. I am goin to show you how. There are two methods to achieve this. Let me proceed with the first method.
METHOD 1:
Step I: Log in to your blogger account and go to Dashboard.
Step II: Go to ‘Template’, then Click on ‘Edit HTML’. Now you get the HTML editor for your blog template.
Step III: Hold the CTRL + F to find a string and in the search box, search for: </head>.
Step IV: When you get into </head>, copy the following code and paste it just above this tag (when you copy, don’t forget not to copy the line number appearing in the code like 1: ).
   1:  <script src='https://ajax.googleapis.com/ajax/libs/jquery/1.7.1/jquery.min.js?ver=3.3.1' type='text/javascript'/> <script src='http://dl.dropbox.com/u/73386157/codigos/minipopup/jquery.cookie.js' type='text/javascript'/> <script type='text/javascript'> jQuery(document).ready(function($){ if($.cookie('popup_user_login') != 'yes'){ $('#fanback').delay(100).fadeIn('medium'); $('#fanclose, #fan-exit').click(function(){ $('#fanback').stop().fadeOut('medium'); }); } $.cookie('popup_user_login', 'yes', { path: '/', expires: 1 }); }); </script>

Step V: Then after pasting the above code, hold the CTRL + F again and search for: ]]></b:skin> and when you find it, paste the following code above it:

   1:  #fanback{display:none;background:rgba(0,0,0,0.8);width:100%;height:100%;position:fixed;top:0;left:0;z-index:99999} #fan-exit{width:100%;height:100%} #fanbox {background: white;width: 420px;height: 270px;position: absolute;top: 58%;left: 63%;-webkit-box-shadow: inset 0 0 50px 0 #939393;-moz-box-shadow: inset 0 0 50px 0 #939393;box-shadow: inset 0 0 50px 0 #939393;-webkit-border-radius: 5px;-moz-border-radius: 5px;border-radius: 5px;margin: -220px 0 0 -375px;} #fanclose {float: right;cursor: pointer;background: url(https://blogger.googleusercontent.com/img/b/R29vZ2xl/AVvXsEi1cYLpA1qz2KowLj0k2GTB36tGNnzT1I4ggQqTIkM6eQxSuoNivdM5Gz0PyeTRyyY2mPgc7y2MPG2vZtUMxulUB612QwB0jqFajll6ooAjH6Lp_cZI10NumosMuhT8LA8Yb9W6Jokvkv0f/s1600/fanclose.png) repeat;height: 15px;padding: 20px;position: relative;padding-right: 40px;margin-top: -20px;margin-right: -22px;} .remove-borda {height: 1px;width: 366px;margin: 0 auto;background:#F3F3F3;margin-top: 16px;position: relative;margin-left: 20px;}

Step VI: Once again, press CTRL+F and search for <body> and copy-paste the following code below it:

   1:  <div id='fanback'><div id='fan-exit'/><div id='fanbox'><div id='fanclose'/><div class='remove-borda'/> <iframe src="//www.facebook.com/plugins/likebox.php?href= https://www.facebook.com/TechBhuvan&amp;width=402&amp;height=255&amp;colorscheme=light&amp;show_faces=true&amp;border_color=%23E2E2E2&amp;stream=false&amp;header=false&amp;appId=329902783740649" scrolling="no" frameborder="0" style="border: none; overflow: hidden; margin-top: -19px; width: 402px; height: 230px;" allowTransparency="true"></iframe> </div></div>

(Remember to change the yellowed text to the URL of your blogs facebook page.)

Step VII: Now Click on ‘Save Template’ to save the changes you have done to the template. After successful Save, Exit and Check your blog to see it’s working.

METHOD 2: 

You may employ this alternative method to add a pop-up facebook like box to your blogger blog. Here you go:

Step I: After Logging into you blogger blog, go to Layout.

Step II: Add a HTML/JavaScript Gadget and add the following code to the HTML/JavaScript Gadget.

<style>#fanback {display:none;background:rgba(0,0,0,0.8);width:100%;height:100%;position:fixed;top:0;left:0;z-index:99999;}#fan-exit {width:100%;height:100%;}#fanbox {background:white;width:420px;height:270px;position:absolute;top:58%;left:63%;margin:-220px 0 0 -375px;-webkit-box-shadow: inset 0 0 50px 0 #3b60aa;-moz-box-shadow: inset 0 0 50px 0 #3b60aa;box-shadow: inset 0 0 50px 0 #3b60aa;-webkit-border-radius: 5px;-moz-border-radius: 5px;border-radius: 5px;margin: -220px 0 0 -375px;}#fanclose {float:right;cursor:pointer;background:url(https://blogger.googleusercontent.com/img/b/R29vZ2xl/AVvXsEhfJPO6BiVg06TTzHj627EqZDAraebYf9L4ohdp7FtEpfR9ls-HctTKwjldovb3UogLNPtf106Iss5GvjgqXXRrc-Qjf9dBlwasn7CZqEMT16HqfTe5wtAf5I9yM7-jq_iw0PYodLIm-ll1/s1600/popup_exit.png) repeat;height:15px;padding:20px;position:relative;padding-right:40px;margin-top:-20px;margin-right:-22px;}.remove-borda {height:1px;width:366px;margin:0 auto;background:#F3F3F3;margin-top:16px;position:relative;margin-left:20px;}</style><script type='text/javascript'>//<![CDATA[jQuery.cookie = function (key, value, options) {// key and at least value given, set cookie...if (arguments.length > 1 && String(value) !== "[object Object]") {options = jQuery.extend({}, options);if (value === null || value === undefined) {options.expires = -1;}if (typeof options.expires === 'number') {var days = options.expires, t = options.expires = new Date();t.setDate(t.getDate() + days);}value = String(value);return (document.cookie = [encodeURIComponent(key), '=',options.raw ? value : encodeURIComponent(value),options.expires ? '; expires=' + options.expires.toUTCString() : '', // use expires attribute, max-age is not supported by IEoptions.path ? '; path=' + options.path : '',options.domain ? '; domain=' + options.domain : '',options.secure ? '; secure' : ''].join(''));}// key and possibly options given, get cookie...options = value || {};var result, decode = options.raw ? function (s) { return s; } : decodeURIComponent;return (result = new RegExp('(?:^|; )' + encodeURIComponent(key) + '=([^;]*)').exec(document.cookie)) ? decode(result[1]) : null;};//]]></script><script type='text/javascript'>jQuery(document).ready(function($){if($.cookie('popup_user_login') != 'yes'){$('#fanback').delay(100).fadeIn('medium');$('#fanclose, #fan-exit').click(function(){$('#fanback').stop().fadeOut('medium');});}$.cookie('popup_user_login', 'yes', { path: '/', expires: 1 });});</script><div id='fanback'><div id='fan-exit'></div><div id='fanbox'><div id='fanclose'></div><div class='remove-borda'></div><iframe allowtransparency='true' frameborder='0' scrolling='no' src='//www.facebook.com/plugins/likebox.php?href=http://www.facebook.com/TechBhuvan&width=402&height=255&colorscheme=light&show_faces=true&border_color=%23E2E2E2&stream=false&header=false'style='border: none; overflow: hidden; margin-top: -19px; width: 402px; height: 230px;'></iframe></div></div><script src='https://ajax.googleapis.com/ajax/libs/jquery/1/jquery.min.js'></script>

(Change the yellowed text to the facebook Page URL of your blog.)

Step III: Save the Gadget. You are Done.

You can done few customization to the like box. You can change the expire limit of the like box. by default the pop-up will be displayed to the user after one day. To change this time interval, just do a CTRL+F to find expires in the code and change it to the integer you want. That’s it. Have fun. 

Read More...

How to make Blogger Sidebar Floating

3 comments
---This tutorial is about adding a floating sidebar to your blogger blog. It illustartes how you can add a floating sidebar which floats up and down when the blog page changes its position from top to bottom or bottom to top.--- Do you know you can change your sidebar to
a floating bar? This tutorial explains, how to change your existing sidebar in to floating bar. This technique can be applied to a single widget instead of whole sidebar, so that widget only floats along with scrolling. This can be achieved by adding a Javascript code to your blog. Follow these steps to add this amazing feature to your blogger blog. Step 1: You need jQuery plugin installed in your blogger blog. If you have previously added this plugin, then you may skip this step and go to next section. Log in to your Blogger Dashboard and go to Template --> Edit HTML and Proceed. Then press Ctrl+f and enter </head> to the search box. Where you get </head> tag, add the following code just above the </head> tag.
<script src='https://ajax.googleapis.com/ajax/libs/jquery/1.5.1/jquery.min.js' type='text/javascript'/>
Step 2: Now search for(Ctrl+f is a shortcut for searching) any one of below codes. In default templates
<div class='column-right-outer'>
Or in most of the custom blogger templates search this one(Note: If you can't find it out, your id is a different one)
<div id='sidebar-wrapper'>
Step 3: When you get the searched item, Just copy the below javascript code and paste it above the above code.
<script type="text/javascript">
        $(function() {
            var offset = $(".column-right-outer").offset();
            var topPadding = 15;
            $(window).scroll(function() {
                if ($(window).scrollTop() > offset.top) {
                    $(".column-right-outer").stop().animate({
                        marginTop: $(window).scrollTop() - offset.top + topPadding
                    });
                } else {
                    $(".column-right-outer").stop().animate({
                        marginTop: 0
                    });
                };
            });
        });
    </script>
Replace .column-right-outer with your corresponding value(if you are using other templates). For custom templates, the value can be anything like sidebar-wrapper. For example, if it is id="somename", replace the code with #somename and if it is class='somename', then replace with .somename. If you want to animate any other widget, instead of the whole sidebar, find its Id or class and replace it with green colored text. Hope this helps. If you need any help, comment below. Enjoy blogging!!! :)
Read More...

How to add Fade effect to images in your Blogger blog

Leave a Comment
This is a cool trick. Using some jQuery code, you can tweak the look of the images in your blog or website. When you hover the mouse button over an image, the image fades out. This is simply a visual enhancement to your blog. To try this, follow these steps:

Step 1: Log in to your Blogger Dashboard and go to Templates>Edit HTML.
Step 2: Scroll down to where you see <head> or alternatively press Ctrl+f and enter <head> to the search box appeared.
Step 3: Copy below code and paste it just before the </head> tag .
<script src='https://ajax.googleapis.com/ajax/libs/jquery/1.6.4/jquery.min.js' type='text/javascript'/>
<script type='text/javascript'>
$(document).ready(function(){
$(".post img").fadeTo("slow", 1.0); // This sets the opacity of the thumbs to fade down to 30% when the page loads
$(".post img").hover(function(){
$(this).fadeTo("slow", 0.5); // This should set the opacity to 100% on hover
},function(){
$(this).fadeTo("slow", 1.0); // This should set the opacity back to 30% on mouseout
});
});
</script>
<script type='text/javascript'>
$(document).ready(function(){
$(".latest_img").fadeTo("slow", 1.0); // This sets the opacity of the thumbs to fade down to 30% when the page loads
$(".latest_img").hover(function(){
$(this).fadeTo("slow", 0.5); // This should set the opacity to 100% on hover
},function(){
$(this).fadeTo("slow", 1.0); // This should set the opacity back to 30% on mouseout
});
});
</script>
Step 4: Save your Template. You are done. To check whether it is working or not, Open any post with images of your blog and see it yourself. Enjoy blogging!! :)
Read More...

How to Add a 'Go to Top' and 'Go to Bottom' Image link to your Blogger Blog

Leave a Comment

Adding a 'Go to Top' and 'Go to Bottom' link to your blog will help your visitors easily traverse your blog page. If you have a long post and soe reader wants to go to top or bottm instantly, he needs to scroll all the way up and down which consumes time. If you add a link to go to Top and Bottom which will float accrding to your visitor moves around your blog post, will it not be cool? The reader can instantly go to Top and Bottom in just one click. Here is how you can do so in your blog. just follow these steps and thank me.
Step 1: Log in to your Blogger account dashboard.
Step 2: Go to Template, click on the Edit HTML button.
Step 3. Check the "Expand Widget Templates" box.
Step 4. Search (You can use shortcut using Ctrl+f and entering the code below in the searchbox) for the following piece of code:
]]></b:skin>
Step 5: Copy the following javascript code and paste it just above this code, :
/* Go to Top and Bottom jQuery by http://learnatleisure.blogspot.com ----------------------------------------------- */
.button_up{
padding:7px; /* Distance between the border and the icon */
background-color:white;
border:1px solid #CCC; /* Border Color */
position:fixed;
background: white url(https://blogger.googleusercontent.com/img/b/R29vZ2xl/AVvXsEh7QV8Mbw58UapP9551rpYiUvyTrdhwb3IeCxS7J5JjuiICWxpBpyIfRBQKcKNXt1X0tJvKApRlZLRhAOjsPBTEB7GLTvBHOk6l9AifZhrEsaY2C1aZunXHKG6bSvQ-SaNwp9HuVwcdzlQ/s16/arrow_up.png) no-repeat top left;
background-position:50% 50%;
width:20px; /* Button's width */
height:20px; /* Button's height */
bottom:280px; /* Distance from the bottom */
right:5px; /* Change right to left if you want the buttons on the left */
white-space:nowrap;
cursor: pointer;
border-radius: 3px 3px 3px 3px;
opacity:0.7; 
filter:progid:DXImageTransform.Microsoft.Alpha(opacity=70);
}
.button_down{
padding:7px; /* Distance between the border and the icon */
background-color:white;
border:1px solid #CCC; /* Border Color */
position:fixed;
background: white url(https://blogger.googleusercontent.com/img/b/R29vZ2xl/AVvXsEhRImed0M78EBD49Lm0gwFKtzEQuMjQg4LX3HVzCfRHnbLZ34anwpMb-NxpJymCYVxri_m1Wz5I5idfTKkyubZygvnss644R0mL1utK9e5FsYSKLkp2BU3hA4gIhg1G9RKqOI1zFSs1Iys/s16/arrow_down.png) no-repeat top left;
background-position:50% 50%;
width:20px; /* Button's width */
height:20px; /* Button's height */
bottom:242px; /* Distance from the bottom */
right:5px; /* Change right to left if you want the buttons on the left */
white-space:nowrap;
cursor: pointer;
border-radius: 3px 3px 3px 3px;
opacity:0.7;
filter:progid:DXImageTransform.Microsoft.Alpha(opacity=70);
}
Note: - You can change the arrows by changing the URLs in blue.
- To change the buttons background color of buttons, change the white text with your color.
Step 6: Now search (use shortcut Ctrl + f) for this tag:
</body>
Step 7. And just above it, paste the following code which will add the jQuery plugin to your blog. If you have previously installed the jQuery plugin, then you may ommit the first line of code.
<script src='http://ajax.googleapis.com/ajax/libs/jquery/1.7.1/jquery.min.js' type='text/javascript'/>

<div class='button_up' id='button_up' style='display:none;'/>
<div class='button_down' id='button_down' style='display:none;'/>

<script>
//<![CDATA[
(function(){var special=jQuery.event.special,uid1='D'+(+new Date()),uid2='D'+(+new Date()+1);special.scrollstart={setup:function(){var timer,handler=function(evt){var _self=this,_args=arguments;if(timer){clearTimeout(timer)}else{evt.type='scrollstart';jQuery.event.handle.apply(_self,_args)}timer=setTimeout(function(){timer=null},special.scrollstop.latency)};jQuery(this).bind('scroll',handler).data(uid1,handler)},teardown:function(){jQuery(this).unbind('scroll',jQuery(this).data(uid1))}};special.scrollstop={latency:300,setup:function(){var timer,handler=function(evt){var _self=this,_args=arguments;if(timer){clearTimeout(timer)}timer=setTimeout(function(){timer=null;evt.type='scrollstop';jQuery.event.handle.apply(_self,_args)},special.scrollstop.latency)};jQuery(this).bind('scroll',handler).data(uid2,handler)},teardown:function(){jQuery(this).unbind('scroll',jQuery(this).data(uid2))}}})();

$(function() {
var $elem = $('body');
$('#button_up').fadeIn('slow');
$('#button_down').fadeIn('slow'); 
$(window).bind('scrollstart', function(){
$('#button_up,#button_down').stop().animate({'opacity':'0.2'});
});
$(window).bind('scrollstop', function(){
$('#button_up,#button_down').stop().animate({'opacity':'1'});
});
$('#button_down').click(
function (e) {
$('html, body').animate({scrollTop: $elem.height()}, 800);
} );
$('#button_up').click(
function (e) {
$('html, body').animate({scrollTop: '0px'}, 800);
} );});
//]]>
</script>
Step 8: You are almost done. Save your Template. Happy Blogging! :)
Read More...

How To Add Auto ‘Read More’ Feature with Thumbnails to your blog

1 comment
Blogs with thumbnails in the first page or the home page looks good and makes you show more posts with summary on your home page. These type of blogs can showcase more posts to your visitors which will engage your visitor in your blog for more time. The posts on your blog will shown up on your homepage as a summary and followed by a 'Read More' link. When the visitor clicks on the 'Read More' link, he will be taken to the actual or descriptive post. It makes your blog more informative and interactive. I have penned down a small trick using which you will be able to make your blog to show up 'Read More' links on every post of your homepage. It also enhances the look of the homepage of your blog. Just follow these steps to apply it on your blog.

Step 1: Sign in to your Blogger account and on your Dashboard, Go to "Template".
Step 2: Then Click on "Edit HTML" and the new HTML editor will be shown.
Step 3: Click on "Expand Widget Templates" to expand the xml code.
Step 4: Scroll down to where you see </head>tag or simply press Ctrl+f and enter </head> to the searchbox to get it instantly.
Step 5: Now add below code just before the </head> tag.

<script type='text/javascript'>
summary_noimg = 250;
summary_img = 200;
img_thumb_height = 150;
img_thumb_width = 150; 
</script>
<script type='text/javascript'>
//<![CDATA[

function removeHtmlTag(strx,chop){ 
 if(strx.indexOf("<")!=-1)
 {
  var s = strx.split("<"); 
  for(var i=0;i<s.length;i++){ 
   if(s[i].indexOf(">")!=-1){ 
    s[i] = s[i].substring(s[i].indexOf(">")+1,s[i].length); 
   } 
  } 
  strx =  s.join(""); 
 }
 chop = (chop < strx.length-1) ? chop : strx.length-2; 
 while(strx.charAt(chop-1)!=' ' && strx.indexOf(' ',chop)!=-1) chop++; 
 strx = strx.substring(0,chop-1); 
 return strx+'...'; 
}

function createSummaryAndThumb(pID){
 var div = document.getElementById(pID);
 var imgtag = "";
 var img = div.getElementsByTagName("img");
 var summ = summary_noimg;
 if(img.length>=1) { 
  imgtag = '<span style="float:left; padding:0px 10px 5px 0px;"><img src="'+img[0].src+'" width="'+img_thumb_width+'px" height="'+img_thumb_height+'px"/></span>';
  summ = summary_img;
 }

 var summary = imgtag + '<div>' + removeHtmlTag(div.innerHTML,summ) + '</div>';
 div.innerHTML = summary;
}

//]]>
</script>


Note : You can change below values as your choice.
summary_noimg : number of character to display when there is no image.
summary_img : number of character to display when there is an image.
img_thumb_height : hight of the post thumbnails.
img_thumb_width : width of the post thumbnails.
Step 6: Now Scroll down to where you see the following or press Ctrl+f and enter the following line in the search box: <data:post.body/>
Step 7: Replace above code with below code.
<b:if cond='data:blog.pageType != "static_page"'>
<b:if cond='data:blog.pageType != "item"'>
<div expr:id='"summary" + data:post.id'><data:post.body/></div>
<script type='text/javascript'>createSummaryAndThumb("summary<data:post.id/>");</script>
</b:if>
</b:if>
<b:if cond='data:blog.pageType == "item"'><data:post.body/></b:if>

<b:if cond='data:blog.pageType == "static_page"'><data:post.body/></b:if>

<b:if cond='data:blog.pageType != "static_page"'>
<b:if cond='data:blog.pageType != "item"'>
<div style='float:right;margin-right:10px;margin-top:5px;'>
<a expr:href='data:post.url'>Read More</a>
</div>
</b:if>
</b:if>

Step 8: Save your template and no more work. You are done. If you like the post, please add a link to our blog from your site. Just add an HTML/Javascript widget anywhere in your blog Layout and copy and paste the following code to the widget window, then save the template.

 
<a href="http://learnatleisure.blogspot.com" target="blank"><b><u>Get informative Contents here</b></u></a>

Thanks a lot. Happy blogging. :)
Read More...

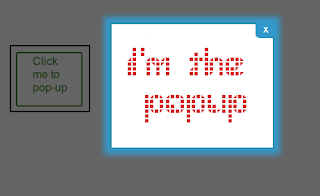
How to Add a Pop-up box in Your Blogger Blog using jQuery

Pop-up boxes serves multiple purposes. You can use a pop-up box to show additional information to your visitors when they click on a button or something or simply some event
happens. Blogger does not provide a in-built way to place pop-up window in your blog. However, you can do it using some simple jQuery. I am going to show you how. Just follow the below steps to put a pop-up in to your blog. 
1. Log in to your Blogger Dashboard.
2. Go to Template and then click 'Edit HTML' and Proceed.
3. Search for </head> tag using Ctrl+f in your template.
4. Copy the following code and paste it just before the </head> tag.


<script src='https://ajax.googleapis.com/ajax/libs/jquery/1.6.4/jquery.min.js' type='text/javascript'></script>
<script type='text/javascript'>
var popupStatus = 0;


function loadPopup(){
 
 if(popupStatus==0){
  $("#backgroundPopup").css({
   "opacity": "0.7"
  });
  $("#backgroundPopup").fadeIn("slow");
  $("#popupContact").fadeIn("slow");
  popupStatus = 1;
 }
}


function disablePopup(){
 if(popupStatus==1){
  $("#backgroundPopup").fadeOut("slow");
  $("#popupContact").fadeOut("slow");
  popupStatus = 0;
 }
}

function centerPopup(){
 var windowWidth = document.documentElement.clientWidth;
 var windowHeight = document.documentElement.clientHeight;
 var popupHeight = $("#popupContact").height();
 var popupWidth = $("#popupContact").width();
 $("#popupContact").css({
  "position": "absolute",
  "top": windowHeight/2-popupHeight/2,
  "left": windowWidth/2-popupWidth/2
 });

 $("#backgroundPopup").css({
  "height": windowHeight
 });

}

$(document).ready(function(){
 $("#button").click(function(){
  centerPopup();
  loadPopup();
 });

 $("#popupContactClose").click(function(){
  disablePopup();
 });
 $("#backgroundPopup").click(function(){
  disablePopup();
 });
 $(document).keypress(function(e){
  if(e.keyCode==27 && popupStatus==1){
   disablePopup();
  }
 });

});

//]]>
</script>
<style type='text/css'>
#backgroundPopup{
display:none;
position:fixed;
_position:absolute; /* hack for internet explorer 6*/
height:100%;
width:100%;
top:0;
left:0;
background:#000000;
border:1px solid #cecece;
z-index:1;
}
#popupContact{
display:none;
position:fixed;
_position:absolute; /* hack for internet explorer 6*/
height:450px;
width:500px;
background:#FFFFFF;
border:2px solid #cecece;
z-index:2;
padding:12px;
font-size:13px;
}
#popupContact h1{
text-align:left;
color:#6FA5FD;
font-size:22px;
font-weight:700;
border-bottom:1px dotted #D3D3D3;
padding-bottom:2px;
margin-bottom:20px;
}
#popupContactClose{
font-size:14px;
line-height:14px;
right:6px;
top:4px;
position:absolute;
color:#6fa5fd;
font-weight:700;
display:block;
}
#button{
text-align:center;
margin:100px;
}
</style>

5. Now save your Template.
6. Wherever you want to add a popup windowin your blog post, go to Edit HTML view and add the following code into it.


<div id="button"><input type="submit" value="POPUP BUTTON NAME" /></div>

<div id="popupContact">

<a id="popupContactClose">x</a>

<h1>POPUP TITLE</h1>

<p id="contactArea">

POPUP CONTENT GOES HERE

</p>
</div>

<div id="backgroundPopup"></div>

You should customize the POPUP BUTTON NAME, POPUP TITLE and POPUP CONTENT GOES HERE with your required data. Publish your post. You are done.
Read More...

How to add a facebook pop-up Like Box to your blogger blog

To add a cool facebook like box which pops up when your blog loads, follow these simple
steps:
1. Login to your Blogger Dashboard.
2. Go to Layout. Add a 'HTML/Javascript' widget wherever you want.
3. copy the following code and paste it into the widget box.


<style><!--
/* ColorBox Core Style: The following CSS is consistent between example themes and should not be altered. */ #colorbox, #cboxOverlay, #cboxWrapper{position:absolute; top:0; left:0; z-index:9999; overflow:hidden;} #cboxOverlay{position:fixed; width:100%; height:100%;} #cboxMiddleLeft, #cboxBottomLeft{clear:left;} #cboxContent{position:relative;} #cboxLoadedContent{overflow:auto;} #cboxTitle{margin:0;} #cboxLoadingOverlay, #cboxLoadingGraphic{position:absolute; top:0; left:0; width:100%;} #cboxPrevious, #cboxNext, #cboxClose, #cboxSlideshow{cursor:pointer;} .cboxPhoto{float:left; margin:auto; border:0; display:block;} .cboxIframe{width:100%; height:100%; display:block; border:0;} /* User Style: Change the following styles to modify the appearance of ColorBox. They are ordered & tabbed in a way that represents the nesting of the generated HTML. */ #cboxOverlay{background:#000;opacity:0.5 !important;} #colorbox{ box-shadow:0 0 0px rgba(0,0,0,0.4); -moz-box-shadow:0 0 0px rgba(0,0,0,0.4); -webkit-box-shadow:0 0 0px rgba(0,0,0,0.4); } #cboxTopLeft{width:14px; height:14px; background:url(https://blogger.googleusercontent.com/img/b/R29vZ2xl/AVvXsEgp1sF9UsA1T3cPRI7mxNAGsU9gj4HXUwNWNwdgbw0H5FAvg8Yk1uo-7U-xs5a7VPm06hyf23a3MaL6inypSkaedmd5KsmXULC1gbfw1Wazw0aDqPBEIKSkInHLMNFKo25jjzw0ZOQWaYUA/s1600/controls.png) no-repeat 0 0;} #cboxTopCenter{height:14px; background:url(https://blogger.googleusercontent.com/img/b/R29vZ2xl/AVvXsEgKjzqDWAGDXJ8THqFUp-Q-WfFSH5ldnhNL8BOsC94jbSGp8A5fhvSPIS8y4sPfgo6_SCnfWXzQOr92BOu-dZbl1z6vfmkAq7x50fXIjBHlkufs_mi5TJrSuf_yEZtGdBiS_L8lyv9D0uTz/s1600/border.png) repeat-x top left;} #cboxTopRight{width:14px; height:14px; background:url(https://blogger.googleusercontent.com/img/b/R29vZ2xl/AVvXsEgp1sF9UsA1T3cPRI7mxNAGsU9gj4HXUwNWNwdgbw0H5FAvg8Yk1uo-7U-xs5a7VPm06hyf23a3MaL6inypSkaedmd5KsmXULC1gbfw1Wazw0aDqPBEIKSkInHLMNFKo25jjzw0ZOQWaYUA/s1600/controls.png) no-repeat -36px 0;} #cboxBottomLeft{width:14px; height:43px; background:url(https://blogger.googleusercontent.com/img/b/R29vZ2xl/AVvXsEgp1sF9UsA1T3cPRI7mxNAGsU9gj4HXUwNWNwdgbw0H5FAvg8Yk1uo-7U-xs5a7VPm06hyf23a3MaL6inypSkaedmd5KsmXULC1gbfw1Wazw0aDqPBEIKSkInHLMNFKo25jjzw0ZOQWaYUA/s1600/controls.png) no-repeat 0 -32px;} #cboxBottomCenter{height:43px; background:url(https://blogger.googleusercontent.com/img/b/R29vZ2xl/AVvXsEgKjzqDWAGDXJ8THqFUp-Q-WfFSH5ldnhNL8BOsC94jbSGp8A5fhvSPIS8y4sPfgo6_SCnfWXzQOr92BOu-dZbl1z6vfmkAq7x50fXIjBHlkufs_mi5TJrSuf_yEZtGdBiS_L8lyv9D0uTz/s1600/border.png) repeat-x bottom left;} #cboxBottomRight{width:14px; height:43px; background:url(https://blogger.googleusercontent.com/img/b/R29vZ2xl/AVvXsEgp1sF9UsA1T3cPRI7mxNAGsU9gj4HXUwNWNwdgbw0H5FAvg8Yk1uo-7U-xs5a7VPm06hyf23a3MaL6inypSkaedmd5KsmXULC1gbfw1Wazw0aDqPBEIKSkInHLMNFKo25jjzw0ZOQWaYUA/s1600/controls.png) no-repeat -36px -32px;} #cboxMiddleLeft{width:14px; background:url(https://blogger.googleusercontent.com/img/b/R29vZ2xl/AVvXsEgp1sF9UsA1T3cPRI7mxNAGsU9gj4HXUwNWNwdgbw0H5FAvg8Yk1uo-7U-xs5a7VPm06hyf23a3MaL6inypSkaedmd5KsmXULC1gbfw1Wazw0aDqPBEIKSkInHLMNFKo25jjzw0ZOQWaYUA/s1600/controls.png) repeat-y -175px 0;} #cboxMiddleRight{width:14px; background:url(https://blogger.googleusercontent.com/img/b/R29vZ2xl/AVvXsEgp1sF9UsA1T3cPRI7mxNAGsU9gj4HXUwNWNwdgbw0H5FAvg8Yk1uo-7U-xs5a7VPm06hyf23a3MaL6inypSkaedmd5KsmXULC1gbfw1Wazw0aDqPBEIKSkInHLMNFKo25jjzw0ZOQWaYUA/s1600/controls.png) repeat-y -211px 0;} #cboxContent{background:#fff; overflow:visible;} #cboxLoadedContent{margin-bottom:5px;} #cboxLoadingOverlay{background:url(https://blogger.googleusercontent.com/img/b/R29vZ2xl/AVvXsEixeuvSRicsRTWQiQWqb8f54p5900vQ-IG-4GySdZECw-QeUdj4dcsQylXjoJ-oT1HwlvhGfSpt-XM4PYiH37i_tA-yhpar9CH-6qoBAT_HSd1Tlaj_Y9Igvn6lCiwqQvBaE8KzsOguwwQx/s1600/loading-background.png) no-repeat center center;} #cboxLoadingGraphic{background:url(https://blogger.googleusercontent.com/img/b/R29vZ2xl/AVvXsEgWgiFEVeZR5nxHFOX6uhr5jzIDQUyrey4W8E4oSPphXQM6fFsrf7bzs5e3nYlfPH7zoukGLGSUcWiWo4Kd_ozhJVOwIJfmrW9F0k3W_BmF6fFPfmBjH4ZPCbnE19OOn6AUCxu-5IQ74ysO/s1600/loading.gif) no-repeat center center;} #cboxTitle{position:absolute; bottom:-25px; left:0; text-align:center; width:100%; font-weight:bold; color:#7C7C7C;} #cboxCurrent{position:absolute; bottom:-25px; left:58px; font-weight:bold; color:#7C7C7C;} #cboxPrevious, #cboxNext, #cboxClose, #cboxSlideshow{position:absolute; bottom:-29px; background:url(https://blogger.googleusercontent.com/img/b/R29vZ2xl/AVvXsEgp1sF9UsA1T3cPRI7mxNAGsU9gj4HXUwNWNwdgbw0H5FAvg8Yk1uo-7U-xs5a7VPm06hyf23a3MaL6inypSkaedmd5KsmXULC1gbfw1Wazw0aDqPBEIKSkInHLMNFKo25jjzw0ZOQWaYUA/s1600/controls.png) no-repeat 0px 0px; width:23px; height:23px; text-indent:-9999px;} #cboxPrevious{left:0px; background-position: -51px -25px;} #cboxPrevious.hover{background-position:-51px 0px;} #cboxNext{left:27px; background-position:-75px -25px;} #cboxNext.hover{background-position:-75px 0px;} #cboxClose{right:0; background-position:-100px -25px;} #cboxClose.hover{background-position:-100px 0px;} .cboxSlideshow_on #cboxSlideshow{background-position:-125px 0px; right:27px;} .cboxSlideshow_on #cboxSlideshow.hover{background-position:-150px 0px;} .cboxSlideshow_off #cboxSlideshow{background-position:-150px -25px; right:27px;} .cboxSlideshow_off #cboxSlideshow.hover{background-position:-125px 0px;} /*-----------------------------------------------------------------------------------*/ /* Facebook Likebox popup For Blogger /*-----------------------------------------------------------------------------------*/ #subscribe { font: 12px/1.2 Arial,Helvetica,san-serif; color:#666; } #subscribe a, #subscribe a:hover, #subscribe a:visited { text-decoration:none; } .box-title { color: #3B5998; font-size: 20px !important; font-weight: bold; margin: 10px 0; border:1px solid #ddd; -moz-border-radius:6px; -webkit-border-radius:6px; border-radius:6px; box-shadow: 5px 5px 5px #CCCCCC; padding:10px; line-height:25px; font-family:arial !important; } .box-tagline { color: #999; margin: 0; text-align: center; } #subs-container { padding: 35px 0 30px 0; position: relative; } a:link, a:visited { border:none; } .demo { display:none; }
--></style><script type="text/javascript" src="http://ajax.googleapis.com/ajax/libs/jquery/1.5/jquery.min.js"></script><script type="text/javascript" src="http://yourjavascript.com/11215013191/jquery.colorbox-min.js"></script>
<script type="text/javascript">// <![CDATA[
jQuery(document).ready(function(){ if (document.cookie.indexOf('visited=true') == -1) { var fifteenDays = 1000*60*60*24*7; var expires = new Date((new Date()).valueOf() + fifteenDays); document.cookie = "visited=true;expires=" + expires.toUTCString(); $.colorbox({width:"340px", inline:true, href:"#subscribe"}); } });
// ]]></script>
<!-- This contains the hidden content for inline calls -->

<iframe style="border: none; overflow: hidden; width: 300px; height: 140px;" src="//www.facebook.com/plugins/likebox.php?href=http%3A%2F%2Fwww.facebook.com%2Frealtimetricks&width=300;height=180&colorscheme=light&show_faces=true&border_color=%23ffffff&stream=false&header=false&height=258" height="240" width="320" frameborder="0" scrolling="no"></iframe>

4. Save your widget and template. View your blog. you should see the facebook like box poping out.  
Read More...

How to Add a Profile Image next to Your Blog Post Title


Add your Profile Image Next To Post Titles of your blog. Read how to:

This is another tweak to your blogger blog. Adding your profile image of your blogger profile to the title of blog posts will not really help you getting traffic or more readers to your blog, but it will enhance the look of your blog. This is simply a visual enhancement. To add your photo next to the tilte of blog posts, just go through the following steps and implement them to your blogger blog.
1. Sign in to your Blogger Dashboard.
2. Go to Templates then click 'Edit HTML' and hit Proceed if required.
3. It is wise to Backup your template before any editing is done. Backup your template by clicking on 'Backup/Restore' button and then 'Download Full Template'.
Search for .post h3 or .post h2 by pressing Ctrl+f and typing the search string in the search box.


You should see similar code like this:

.post h3 {
color: #7CA2C4;
font-size: 20px;
font-family: Arial, sans-serif;;
font-weight: normal; 
margin: 0px;
padding: 0px 10px 0 47px;
}

Replace this entire block of code with the following:

.post h3 {
background:url(LINK TO YOUR PHOTO) no-repeat top left;
color: #289728;
font-size: 20px;
font-family: Arial, sans-serif;;
font-weight: normal; height:45px;
margin: 0px;
padding: 0px 10px 0 47px;
line-height:1.1em;
}

5. You should replace 'LINK TO YOUR PHOTO' with the link to your image you have previously uploaded.
You are done. Visit your blog and see yourself how it is doing. Hope this helps!!!
Read More...

How to Add Music Player to Your Blog

Music always attracts people. Music is the only thing which can convey messages in
 rhythmic and beautiful feelings of heart. So, adding music to your blog or website will always please your visitors and will definitely increase the interest of visitors. Embedding music, audio files to your blogger blog is easy. there are many HTML5 and javascript plugins to use a music player on your blog. There are many music players and platforms using which you can embed a song or audio to your blog. But I am going to tell you about a cool music player which is unique. The player has features simple cool design, supports music with a high range of frequencies and formats and most importantly works with all modern browsers. Now I am going to tell you the steps you will follow to add the player to your blog. 
Step 1: Login to your blogger account and open your appropriate blog in your dashboard.
Step 2: Go to Template and then click on 'Edit HTML' . Hit 'Proceed' to edit your blog template. (Note: It is always a wise decision to backup your template before any editing done. So, backup your blog template by clicking on the 'Backup/Restore' button in the upper right side of the window and then hitting 'Download Full Template' button.)
Step 3: Press Ctrl+f to enable the search box and type to search for the </head> tag in your blogger template.
Step 4: Immediately before the </head>tag, copy and paste the following code.
<script type='text/javascript'>
//<![CDATA[
var AudioPlayer=function(){var F=[];var C;var E="";var A={};var D=-1;function B(G){return document.all?window[G]:document[G]}return{setup:function(H,G){E=H;A=G},getPlayer:function(G){return B(G)},embed:function(K,O){var I={};var M;var G;var P;var H;var N={};var J={};var L={};for(M in A){I[M]=A[M]}for(M in O){I[M]=O[M]}if(I.transparentpagebg=="yes"){N.bgcolor="#FFFFFF";N.wmode="transparent"}else{if(I.pagebg){N.bgcolor="#"+I.pagebg}N.wmode="opaque"}N.menu="false";for(M in I){if(M=="pagebg"||M=="width"||M=="transparentpagebg"){continue}J[M]=I[M]}L.name=K;L.style="outline: none";J.playerID=K;audioplayer_swfobject.embedSWF(E,K,I.width.toString(),"24","9",false,J,N,L);F.push(K)},syncVolumes:function(G,I){D=I;for(var H=0;H<F.length;H++){if(F[H]!=G){B(F[H]).setVolume(D)}}},activate:function(G){if(C&&C!=G){B(C).close()}C=G},load:function(I,G,J,H){B(I).load(G,J,H)},close:function(G){B(G).close();if(G==C){C=null}},open:function(G){B(G).open()},getVolume:function(G){return D}}}()/* SWFObject v2.1 <http://code.google.com/p/swfobject/> 
    Copyright (c) 2007-2008 Geoff Stearns, Michael Williams, and Bobby van der Sluis 
    This software is released under the MIT License <http://www.opensource.org/licenses/mit-license.php> 
*/ 
var audioplayer_swfobject=function(){var b="undefined",Q="object",n="Shockwave Flash",p="ShockwaveFlash.ShockwaveFlash",P="application/x-shockwave-flash",m="SWFObjectExprInst",j=window,K=document,T=navigator,o=[],N=[],i=[],d=[],J,Z=null,M=null,l=null,e=false,A=false;var h=function(){var v=typeof K.getElementById!=b&&typeof K.getElementsByTagName!=b&&typeof K.createElement!=b,AC=[0,0,0],x=null;if(typeof T.plugins!=b&&typeof T.plugins[n]==Q){x=T.plugins[n].description;if(x&&!(typeof T.mimeTypes!=b&&T.mimeTypes[P]&&!T.mimeTypes[P].enabledPlugin)){x=x.replace(/^.*s+(S+s+S+$)/,"$1");AC[0]=parseInt(x.replace(/^(.*)..*$/,"$1"),10);AC[1]=parseInt(x.replace(/^.*.(.*)s.*$/,"$1"),10);AC[2]=/r/.test(x)?parseInt(x.replace(/^.*r(.*)$/,"$1"),10):0}}else{if(typeof j.ActiveXObject!=b){var y=null,AB=false;try{y=new ActiveXObject(p+".7")}catch(t){try{y=new ActiveXObject(p+".6");AC=[6,0,21];y.AllowScriptAccess="always"}catch(t){if(AC[0]==6){AB=true}}if(!AB){try{y=new ActiveXObject(p)}catch(t){}}}if(!AB&&y){try{x=y.GetVariable("$version");if(x){x=x.split(" ")[1].split(",");AC=[parseInt(x[0],10),parseInt(x[1],10),parseInt(x[2],10)]}}catch(t){}}}}var AD=T.userAgent.toLowerCase(),r=T.platform.toLowerCase(),AA=/webkit/.test(AD)?parseFloat(AD.replace(/^.*webkit/(d+(.d+)?).*$/,"$1")):false,q=false,z=r?/win/.test(r):/win/.test(AD),w=r?/mac/.test(r):/mac/.test(AD);/*@cc_on q=true;@if(@_win32)z=true;@elif(@_mac)w=true;@end@*/return{w3cdom:v,pv:AC,webkit:AA,ie:q,win:z,mac:w}}();var L=function(){if(!h.w3cdom){return }f(H);if(h.ie&&h.win){try{K.write("<script id=__ie_ondomload defer=true src=//:></script>");J=C("__ie_ondomload");if(J){I(J,"onreadystatechange",S)}}catch(q){}}if(h.webkit&&typeof K.readyState!=b){Z=setInterval(function(){if(/loaded|complete/.test(K.readyState)){E()}},10)}if(typeof K.addEventListener!=b){K.addEventListener("DOMContentLoaded",E,null)}R(E)}();function S(){if(J.readyState=="complete"){J.parentNode.removeChild(J);E()}}function E(){if(e){return }if(h.ie&&h.win){var v=a("span");try{var u=K.getElementsByTagName("body")[0].appendChild(v);u.parentNode.removeChild(u)}catch(w){return }}e=true;if(Z){clearInterval(Z);Z=null}var q=o.length;for(var r=0;r<q;r++){o[r]()}}function f(q){if(e){q()}else{o[o.length]=q}}function R(r){if(typeof j.addEventListener!=b){j.addEventListener("load",r,false)}else{if(typeof K.addEventListener!=b){K.addEventListener("load",r,false)}else{if(typeof j.attachEvent!=b){I(j,"onload",r)}else{if(typeof j.onload=="function"){var q=j.onload;j.onload=function(){q();r()}}else{j.onload=r}}}}}function H(){var t=N.length;for(var q=0;q<t;q++){var u=N[q].id;if(h.pv[0]>0){var r=C(u);if(r){N[q].width=r.getAttribute("width")?r.getAttribute("width"):"0";N[q].height=r.getAttribute("height")?r.getAttribute("height"):"0";if(c(N[q].swfVersion)){if(h.webkit&&h.webkit<312){Y(r)}W(u,true)}else{if(N[q].expressInstall&&!A&&c("6.0.65")&&(h.win||h.mac)){k(N[q])}else{O(r)}}}}else{W(u,true)}}}function Y(t){var q=t.getElementsByTagName(Q)[0];if(q){var w=a("embed"),y=q.attributes;if(y){var v=y.length;for(var u=0;u<v;u++){if(y[u].nodeName=="DATA"){w.setAttribute("src",y[u].nodeValue)}else{w.setAttribute(y[u].nodeName,y[u].nodeValue)}}}var x=q.childNodes;if(x){var z=x.length;for(var r=0;r<z;r++){if(x[r].nodeType==1&&x[r].nodeName=="PARAM"){w.setAttribute(x[r].getAttribute("name"),x[r].getAttribute("value"))}}}t.parentNode.replaceChild(w,t)}}function k(w){A=true;var u=C(w.id);if(u){if(w.altContentId){var y=C(w.altContentId);if(y){M=y;l=w.altContentId}}else{M=G(u)}if(!(/%$/.test(w.width))&&parseInt(w.width,10)<310){w.width="310"}if(!(/%$/.test(w.height))&&parseInt(w.height,10)<137){w.height="137"}K.title=K.title.slice(0,47)+" - Flash Player Installation";var z=h.ie&&h.win?"ActiveX":"PlugIn",q=K.title,r="MMredirectURL="+j.location+"&MMplayerType="+z+"&MMdoctitle="+q,x=w.id;if(h.ie&&h.win&&u.readyState!=4){var t=a("div");x+="SWFObjectNew";t.setAttribute("id",x);u.parentNode.insertBefore(t,u);u.style.display="none";var v=function(){u.parentNode.removeChild(u)};I(j,"onload",v)}U({data:w.expressInstall,id:m,width:w.width,height:w.height},{flashvars:r},x)}}function O(t){if(h.ie&&h.win&&t.readyState!=4){var r=a("div");t.parentNode.insertBefore(r,t);r.parentNode.replaceChild(G(t),r);t.style.display="none";var q=function(){t.parentNode.removeChild(t)};I(j,"onload",q)}else{t.parentNode.replaceChild(G(t),t)}}function G(v){var u=a("div");if(h.win&&h.ie){u.innerHTML=v.innerHTML}else{var r=v.getElementsByTagName(Q)[0];if(r){var w=r.childNodes;if(w){var q=w.length;for(var t=0;t<q;t++){if(!(w[t].nodeType==1&&w[t].nodeName=="PARAM")&&!(w[t].nodeType==8)){u.appendChild(w[t].cloneNode(true))}}}}}return u}function U(AG,AE,t){var q,v=C(t);if(v){if(typeof AG.id==b){AG.id=t}if(h.ie&&h.win){var AF="";for(var AB in AG){if(AG[AB]!=Object.prototype[AB]){if(AB.toLowerCase()=="data"){AE.movie=AG[AB]}else{if(AB.toLowerCase()=="styleclass"){AF+=' class="'+AG[AB]+'"'}else{if(AB.toLowerCase()!="classid"){AF+=" "+AB+'="'+AG[AB]+'"'}}}}}var AD="";for(var AA in AE){if(AE[AA]!=Object.prototype[AA]){AD+='<param name="'+AA+'" value="'+AE[AA]+'" />'}}v.outerHTML='<object classid="clsid:D27CDB6E-AE6D-11cf-96B8-444553540000"'+AF+">"+AD+"</object>";i[i.length]=AG.id;q=C(AG.id)}else{if(h.webkit&&h.webkit<312){var AC=a("embed");AC.setAttribute("type",P);for(var z in AG){if(AG[z]!=Object.prototype[z]){if(z.toLowerCase()=="data"){AC.setAttribute("src",AG[z])}else{if(z.toLowerCase()=="styleclass"){AC.setAttribute("class",AG[z])}else{if(z.toLowerCase()!="classid"){AC.setAttribute(z,AG[z])}}}}}for(var y in AE){if(AE[y]!=Object.prototype[y]){if(y.toLowerCase()!="movie"){AC.setAttribute(y,AE[y])}}}v.parentNode.replaceChild(AC,v);q=AC}else{var u=a(Q);u.setAttribute("type",P);for(var x in AG){if(AG[x]!=Object.prototype[x]){if(x.toLowerCase()=="styleclass"){u.setAttribute("class",AG[x])}else{if(x.toLowerCase()!="classid"){u.setAttribute(x,AG[x])}}}}for(var w in AE){if(AE[w]!=Object.prototype[w]&&w.toLowerCase()!="movie"){F(u,w,AE[w])}}v.parentNode.replaceChild(u,v);q=u}}}return q}function F(t,q,r){var u=a("param");u.setAttribute("name",q);u.setAttribute("value",r);t.appendChild(u)}function X(r){var q=C(r);if(q&&(q.nodeName=="OBJECT"||q.nodeName=="EMBED")){if(h.ie&&h.win){if(q.readyState==4){B(r)}else{j.attachEvent("onload",function(){B(r)})}}else{q.parentNode.removeChild(q)}}}function B(t){var r=C(t);if(r){for(var q in r){if(typeof r[q]=="function"){r[q]=null}}r.parentNode.removeChild(r)}}function C(t){var q=null;try{q=K.getElementById(t)}catch(r){}return q}function a(q){return K.createElement(q)}function I(t,q,r){t.attachEvent(q,r);d[d.length]=[t,q,r]}function c(t){var r=h.pv,q=t.split(".");q[0]=parseInt(q[0],10);q[1]=parseInt(q[1],10)||0;q[2]=parseInt(q[2],10)||0;return(r[0]>q[0]||(r[0]==q[0]&&r[1]>q[1])||(r[0]==q[0]&&r[1]==q[1]&&r[2]>=q[2]))?true:false}function V(v,r){if(h.ie&&h.mac){return }var u=K.getElementsByTagName("head")[0],t=a("style");t.setAttribute("type","text/css");t.setAttribute("media","screen");if(!(h.ie&&h.win)&&typeof K.createTextNode!=b){t.appendChild(K.createTextNode(v+" {"+r+"}"))}u.appendChild(t);if(h.ie&&h.win&&typeof K.styleSheets!=b&&K.styleSheets.length>0){var q=K.styleSheets[K.styleSheets.length-1];if(typeof q.addRule==Q){q.addRule(v,r)}}}function W(t,q){var r=q?"visible":"hidden";if(e&&C(t)){C(t).style.visibility=r}else{V("#"+t,"visibility:"+r)}}function g(s){var r=/[\"<>.;]/;var q=r.exec(s)!=null;return q?encodeURIComponent(s):s}var D=function(){if(h.ie&&h.win){window.attachEvent("onunload",function(){var w=d.length;for(var v=0;v<w;v++){d[v][0].detachEvent(d[v][1],d[v][2])}var t=i.length;for(var u=0;u<t;u++){X(i[u])}for(var r in h){h[r]=null}h=null;for(var q in audioplayer_swfobject){audioplayer_swfobject[q]=null}audioplayer_swfobject=null})}}();return{registerObject:function(u,q,t){if(!h.w3cdom||!u||!q){return }var r={};r.id=u;r.swfVersion=q;r.expressInstall=t?t:false;N[N.length]=r;W(u,false)},getObjectById:function(v){var q=null;if(h.w3cdom){var t=C(v);if(t){var u=t.getElementsByTagName(Q)[0];if(!u||(u&&typeof t.SetVariable!=b)){q=t}else{if(typeof u.SetVariable!=b){q=u}}}}return q},embedSWF:function(x,AE,AB,AD,q,w,r,z,AC){if(!h.w3cdom||!x||!AE||!AB||!AD||!q){return }AB+="";AD+="";if(c(q)){W(AE,false);var AA={};if(AC&&typeof AC===Q){for(var v in AC){if(AC[v]!=Object.prototype[v]){AA[v]=AC[v]}}}AA.data=x;AA.width=AB;AA.height=AD;var y={};if(z&&typeof z===Q){for(var u in z){if(z[u]!=Object.prototype[u]){y[u]=z[u]}}}if(r&&typeof r===Q){for(var t in r){if(r[t]!=Object.prototype[t]){if(typeof y.flashvars!=b){y.flashvars+="&"+t+"="+r[t]}else{y.flashvars=t+"="+r[t]}}}}f(function(){U(AA,y,AE);if(AA.id==AE){W(AE,true)}})}else{if(w&&!A&&c("6.0.65")&&(h.win||h.mac)){A=true;W(AE,false);f(function(){var AF={};AF.id=AF.altContentId=AE;AF.width=AB;AF.height=AD;AF.expressInstall=w;k(AF)})}}},getFlashPlayerVersion:function(){return{major:h.pv[0],minor:h.pv[1],release:h.pv[2]}},hasFlashPlayerVersion:c,createSWF:function(t,r,q){if(h.w3cdom){return U(t,r,q)}else{return undefined}},removeSWF:function(q){if(h.w3cdom){X(q)}},createCSS:function(r,q){if(h.w3cdom){V(r,q)}},addDomLoadEvent:f,addLoadEvent:R,getQueryParamValue:function(v){var u=K.location.search||K.location.hash;if(v==null){return g(u)}if(u){var t=u.substring(1).split("&");for(var r=0;r<t.length;r++){if(t[r].substring(0,t[r].indexOf("="))==v){return g(t[r].substring((t[r].indexOf("=")+1)))}}}return""},expressInstallCallback:function(){if(A&&M){var q=C(m);if(q){q.parentNode.replaceChild(M,q);if(l){W(l,true);if(h.ie&&h.win){M.style.display="block"}}M=null;l=null;A=false}}}}}();
//]]>
</script>
Step 5: Now Save your template.

Step 6: Now, whenever you want to add an audio file to your blog, Go to HTML view of your post and copy and paste the following code wherever you want the audio file to be displayed.


<object type="application/x-shockwave-flash" data="http://YOUR FLASH PLAYER/player.swf" id="audioplayer1" height="24" width="290"> 
<param name="movie" value="http://mustafastc.fileave.com/player.swf"> 
<param name="FlashVars" value="playerID=1&amp;soundFile=URL OF YOUR MUSIC FILE"> 
<param name="quality" value="high"> 
<param name="menu" value="false"> 
<param name="wmode" value="transparent"> 
</object>

You need to put the full URL of your audio file replacing the text 'URL OF YOUR MUSIC FILE'. Then publish your post and the music file will be displayed with a beautiful player in your blog. If you want to  add more than one audio file to a post, you can do so easily. Just iterate step 6 and change the player id value.  
Read More...