Hi everyone, while traversing on the web, I found a very useful trick today which is unknown to most mobile users in India. That is to transfer prepaid mobile balance to your friends number or to your girlfriend/boyfriend, spouse, parents mobile number on emergency. Yes, this is possible to transfer prepaid mobile balance among numbers on the same operator network. That means you can transfer balance from a BSNL number to any other BSNL mobile number, Airtel to Airtel number, Vodafone to Vodafone number etc. This trick may be extremely useful when your friend or someone have emergency requirement to call someone but do not have balance on their mobile and have no money in hand to get his prepaid balance recharged. Here is how you can achieve this.
Transfer Airtel Mobile prepaid balance:
First Follow these steps to send balance from Airtel to Airtel mobile
 SMS GIFT <amount to send> <friend mobile number> to 141 (e.g.
 GIFT 30 90XXXXXXXX).
 You will receive a message saying that you your amount has been transferred to 90XXXXXXXX.
 (Minimum Balance to transfer in Airtel to Airtel prepaid mobile is ₹1/-)
 Terms and Conditions of Airtel are applied for transferring balance. This trick works only in selected circles.
 You are advised to try this trick for low amount first then try for higher amount to trnsfer.
Another Method to transfer balance from Airtel to Airtel prepaid Mobile:
 Dial *141# from your Airtel mobile and follow the simple IVR instructions like press the number of share talk time.
 Transfer Limit is ₹5 to ₹50
 Note that sender should have ₹17 as their minimum balance to use this facility of to transfer balance from Airtel prepaid to Airtel prepaid mobile number.
Vodafone Prepaid Mobile balance transfer:
 Dial *131*<Amount to send>*<Receiver Number># and call. (e.g. *131*30*900XXXXXXX#)
 Transfer Limit is ₹5 to ₹30 only
 There are service charges applied for using this service. The service Charges are as follows: ₹2 (for ₹5 to ₹9 transfer); ₹3( for ₹10 to ₹19 transfer); ₹4(for ₹20 to ₹30 transfer).
 Note: Sender can transfer balance only once in a day and Receiver can receive balance up to 3 times in a day. Also the processing charge differs with every circle so you can ask for transfer charge to your vodafone customer care service.
BSNL Prepaid Mobile balance transfer:
To transfer prepaid balance from BSNL prepaid number to another BSNL  prepaid number, follow these steps:
 SMS GIFT <Reciever BSNL Number> <amount to send> to 53733 or 53738
(eg: GIFT 940XXXXXXX 50 )
Aircel Prepaid mobile to Aircel prepaid mobile balance transfer:
 Dial this code *122*666# to transfer your Aircel prepaid balance.
 Using this service, Aircel prepaid users can transfer balance up to ₹100.
Idea prepaid Mobile to Idea balance transfer:
Idea users try the following steps to send prepaid balance to another Idea number
 Dial: *567*<Receiver’s Number>*<Amount to send># (e.g. *567*9xxxxxxxxx*40#)
 Transfer Limit: transfer limit for this service
 is ₹10 to ₹50.
 A Service charge of ₹2 is employed for using this service.
 The sender can transfer money just once a day.
As an alternative method, try this:
Dial *151*1234*<Idea prepaid Number to send money) * <amount to send> # from your Mobile. You can transfer ₹5 , ₹10 , ₹20 using this code.
Tata Docomo prepaid Mobile fund transfer:
Tata Docomo users can try these methods to transfer money
 SMS BT <Reciever Mobile Number><Amount to send> and send it to 54321 (eg: BT 98XXXXX 50)
 To reverse the Amount a Member needs to type “RBT Transaction ID” and send it to54321
 Charges ₹1 and for reversal no charges.
 Terms and Conditions: The sender’s account balance for “Balance Transfer” has to be Transfer Amount + ₹1 at the time of transfer. If balance is not sufficient the transfer will be declined. However, the SMS will be charged. In case of Reversals the amount reversed will be dependent on the balance available with the recipient.
 The system will recognize “BT” or “bt” or “Bt”
Few More Words: If you are not able to send or transfer prepaid balance to some number, then you should check again that are you doing it the right way? And remember that you cannot transfer prepaid balance cross-provider, means you can send balance only to the same network. Due to mobile number portability, a number may have changed its service proovider, so you need to crosscheck. And mobile service providers keep changing their service numbers, so it may change during due course of time. As far as my knowledge it is working till now.
If you like this, please do share us. Thanks.
 Isn’t it really cool? Well, let me proceed with the steps to teach you do this.
 Isn’t it really cool? Well, let me proceed with the steps to teach you do this.
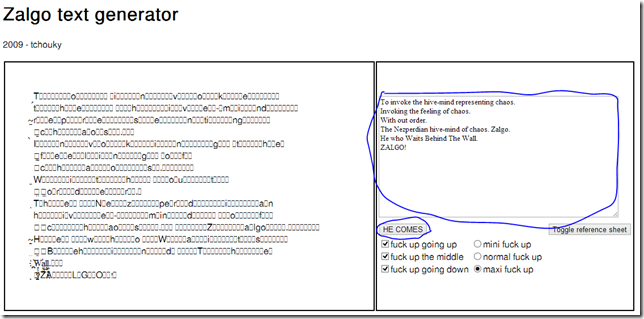
First, go to Zalo text Generator by following this link>>. You will be landing in a page like following.

Enter any text you want to the blue marked area. Apply options as your choice.
Click on ‘’HE COMES ‘ . Copy the text generated in the other text area.
Go to your Facebook profile and paste the text you have copied to your status update.
Post the status and see the magic. All your friends will see the text as dirty spots scattering on the screen and will try to wipe them up.
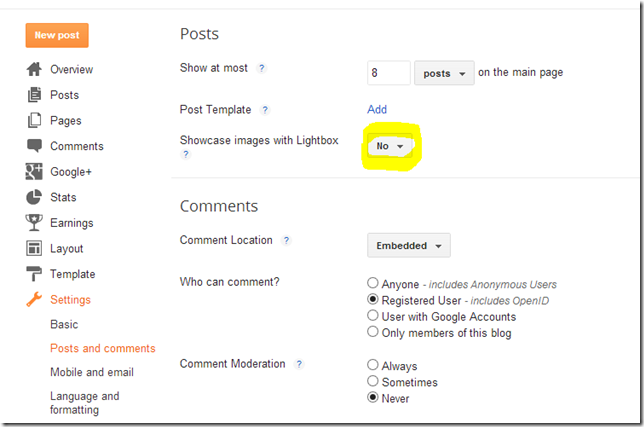
 Log in to your blogger account and go to your blog’s Dashboard.

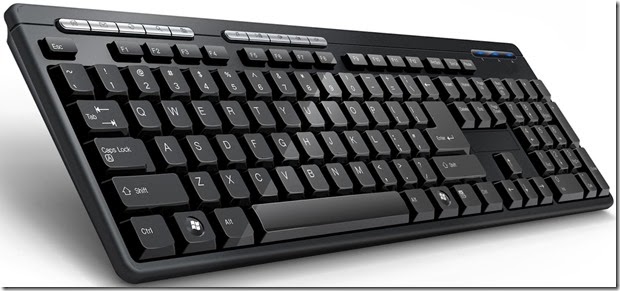
 business, for your personal work or any other purpose, you should know these keyboard shortcuts so that you can save time surfing around. Windows 7 is a great and feature rich operating system which can be handled very cleverly and perform jobs very smartly. Just take a look at the following keyboard shortcuts.
 using Android devices today in the world. But there is always a risk of lost or theft with every gadget. And since Android devices can be used to store many confidential information and many useful data, it is always a threat to your personal and confidential life when your android device is lost or stolen. There are some apps you can install on your device to find it in case you lose the device. There is a smart solution to this, to find your android smartphone after losing it or after being stolen. That is to protect your device with Google’s android device manager which can be configured directly from your android smartphone. This may be very useful when your phone is stolen, you have lost your smartphone or tablet or if you have misplace your Android phone somewhere and forgot where you have placed it.
 Go to Settings on your android device.
  Ring the device: While enabling this option, your device will ring in full volume for 5 minutes even if it is in silent mode. this feature is useful if you frequently forget where you have put your phone and cannot find it. Unfortunately this feature is useless when the phone is put into switched off mode, because the phone will not ring when it is switched off.
  GIFT 30 90XXXXXXXX).
 prepaid number, follow these steps:
  SMS GIFT <Reciever BSNL Number> <amount to send> to 53733 or 53738
  Dial this code *122*666# to transfer your Aircel prepaid balance.
  Dial: *567*<Receiver’s Number>*<Amount to send># (e.g. *567*9xxxxxxxxx*40#)
 is ₹10 to ₹50.